在云端自动化设置和交付虚拟机

如果你是一个在云端使用 Fedora qcow2 镜像 的开发者或者爱好者,在一个镜像准备使用之前,你总是不得不做一大堆初始化设置。我对此深有体会,所以我很想找到一种使设置过程更加简单的方法。碰巧,整个 Fedora 质量保证团队也有同感,所以我们开发了 Testcloud 。
Testcloud 是一个可以轻松的在几分钟之内准备云镜像测试的工具。它用几个命令就可以在云端自动化设置并交付准备运行的虚拟机(VM)。
Testcloud:
下载 qcow2 镜像用你选择的名称创建实例创建一个密码为 passw0rd,用户名为 fedora 的用户分配一个 IP 地址,以便于你之后用 SSH 登录到云端启动、停止、删除和列出一个实例安装 Testcloud要开始你的旅程,首先你必须安装 Testcloud 软件包。你可以通过终端或者“软件”应用来安装它。在这两种情况下,软件包的名字都是 testcloud 。用以下命令安装:
一旦安装完成,将你所需要的用户添加到 testcloud 用户组,这有助于 Testcloud 自动完成设置过程的剩余部分。执行这两个命令,添加你的用户到 testcloud 用户组,并通过提升组权限重启会话:
添加用户到 testcloud 组
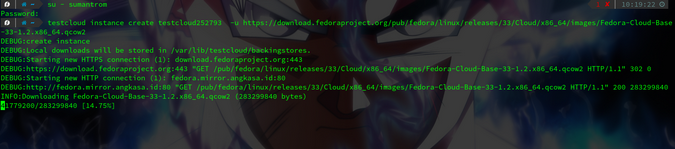
像老手一样玩转云镜像一旦你的用户获得了所需的组权限,创建一个实例:
或者,你可以使用 fedora:latest/fedora:XX(XX 是你的 Fedora 发行版本)来代替 完整的 URL 地址:
这将返回你的虚拟机的 IP 地址:
]
INFO:Successfully booted instance testcloud272593 The IP of vm testcloud272593: 192.168.122.202 ------------------------------------------------------------ To connect to the VM, use the following command (password is passw0rd):
ssh fedora@192.168.122.2021.2.3.4.5.6.7.你可以用默认用户 fedora 登录,密码是 passw0rd(注意是零)。你可以使用 ssh、virt-manager 或者支持连接到 libvirt 虚拟机方式来连接到它。
另一种创建 Fedora 云的方式是:
.
You can fix this by following command(s):
testcloud instance stop testcloud272593 DEBUG:Local downloads will be stored in /var/lib/testcloud/backingstores.
DEBUG:successfully changed SELinux context for image /var/lib/testcloud/backingstores/Fedora-Cloud-Base-33-1.2.x86_64.qcow2 DEBUG:Creating instance directories DEBUG:creating seed image /var/lib/testcloud/instances/testcloud193/testcloud193-seed.img INFO:Seed image generated successfully INFO:Successfully booted instance testcloud193 The IP of vm testcloud193: 192.168.122.225 ------------------------------------------------------------ To connect to the VM, use the following command (password is passw0rd):
ssh fedora@192.168.122.225 ------------------------------------------------------------1.2.3.4.5.6.7.8.9.10.11.12.13.14.15.16.Testcloud 可以用来管理实例。这包括像列出镜像或者停止和启动一个实例等活动。
要列出实例,使用 list 子命令:
要停止一个运行的实例:
要删除一个实例:
.
DEBUG:Unregistering instance from libvirt.
DEBUG:removing instance /var/lib/testcloud/instances/testcloud193 from disk1.2.3.4.5.要重启一个运行中的实例:
]
INFO:Successfully booted instance testcloud93 The IP of vm testcloud93: 192.168.122.152 usage: testcloud [-h] {instance,image} ...1.2.3.4.5.6.